
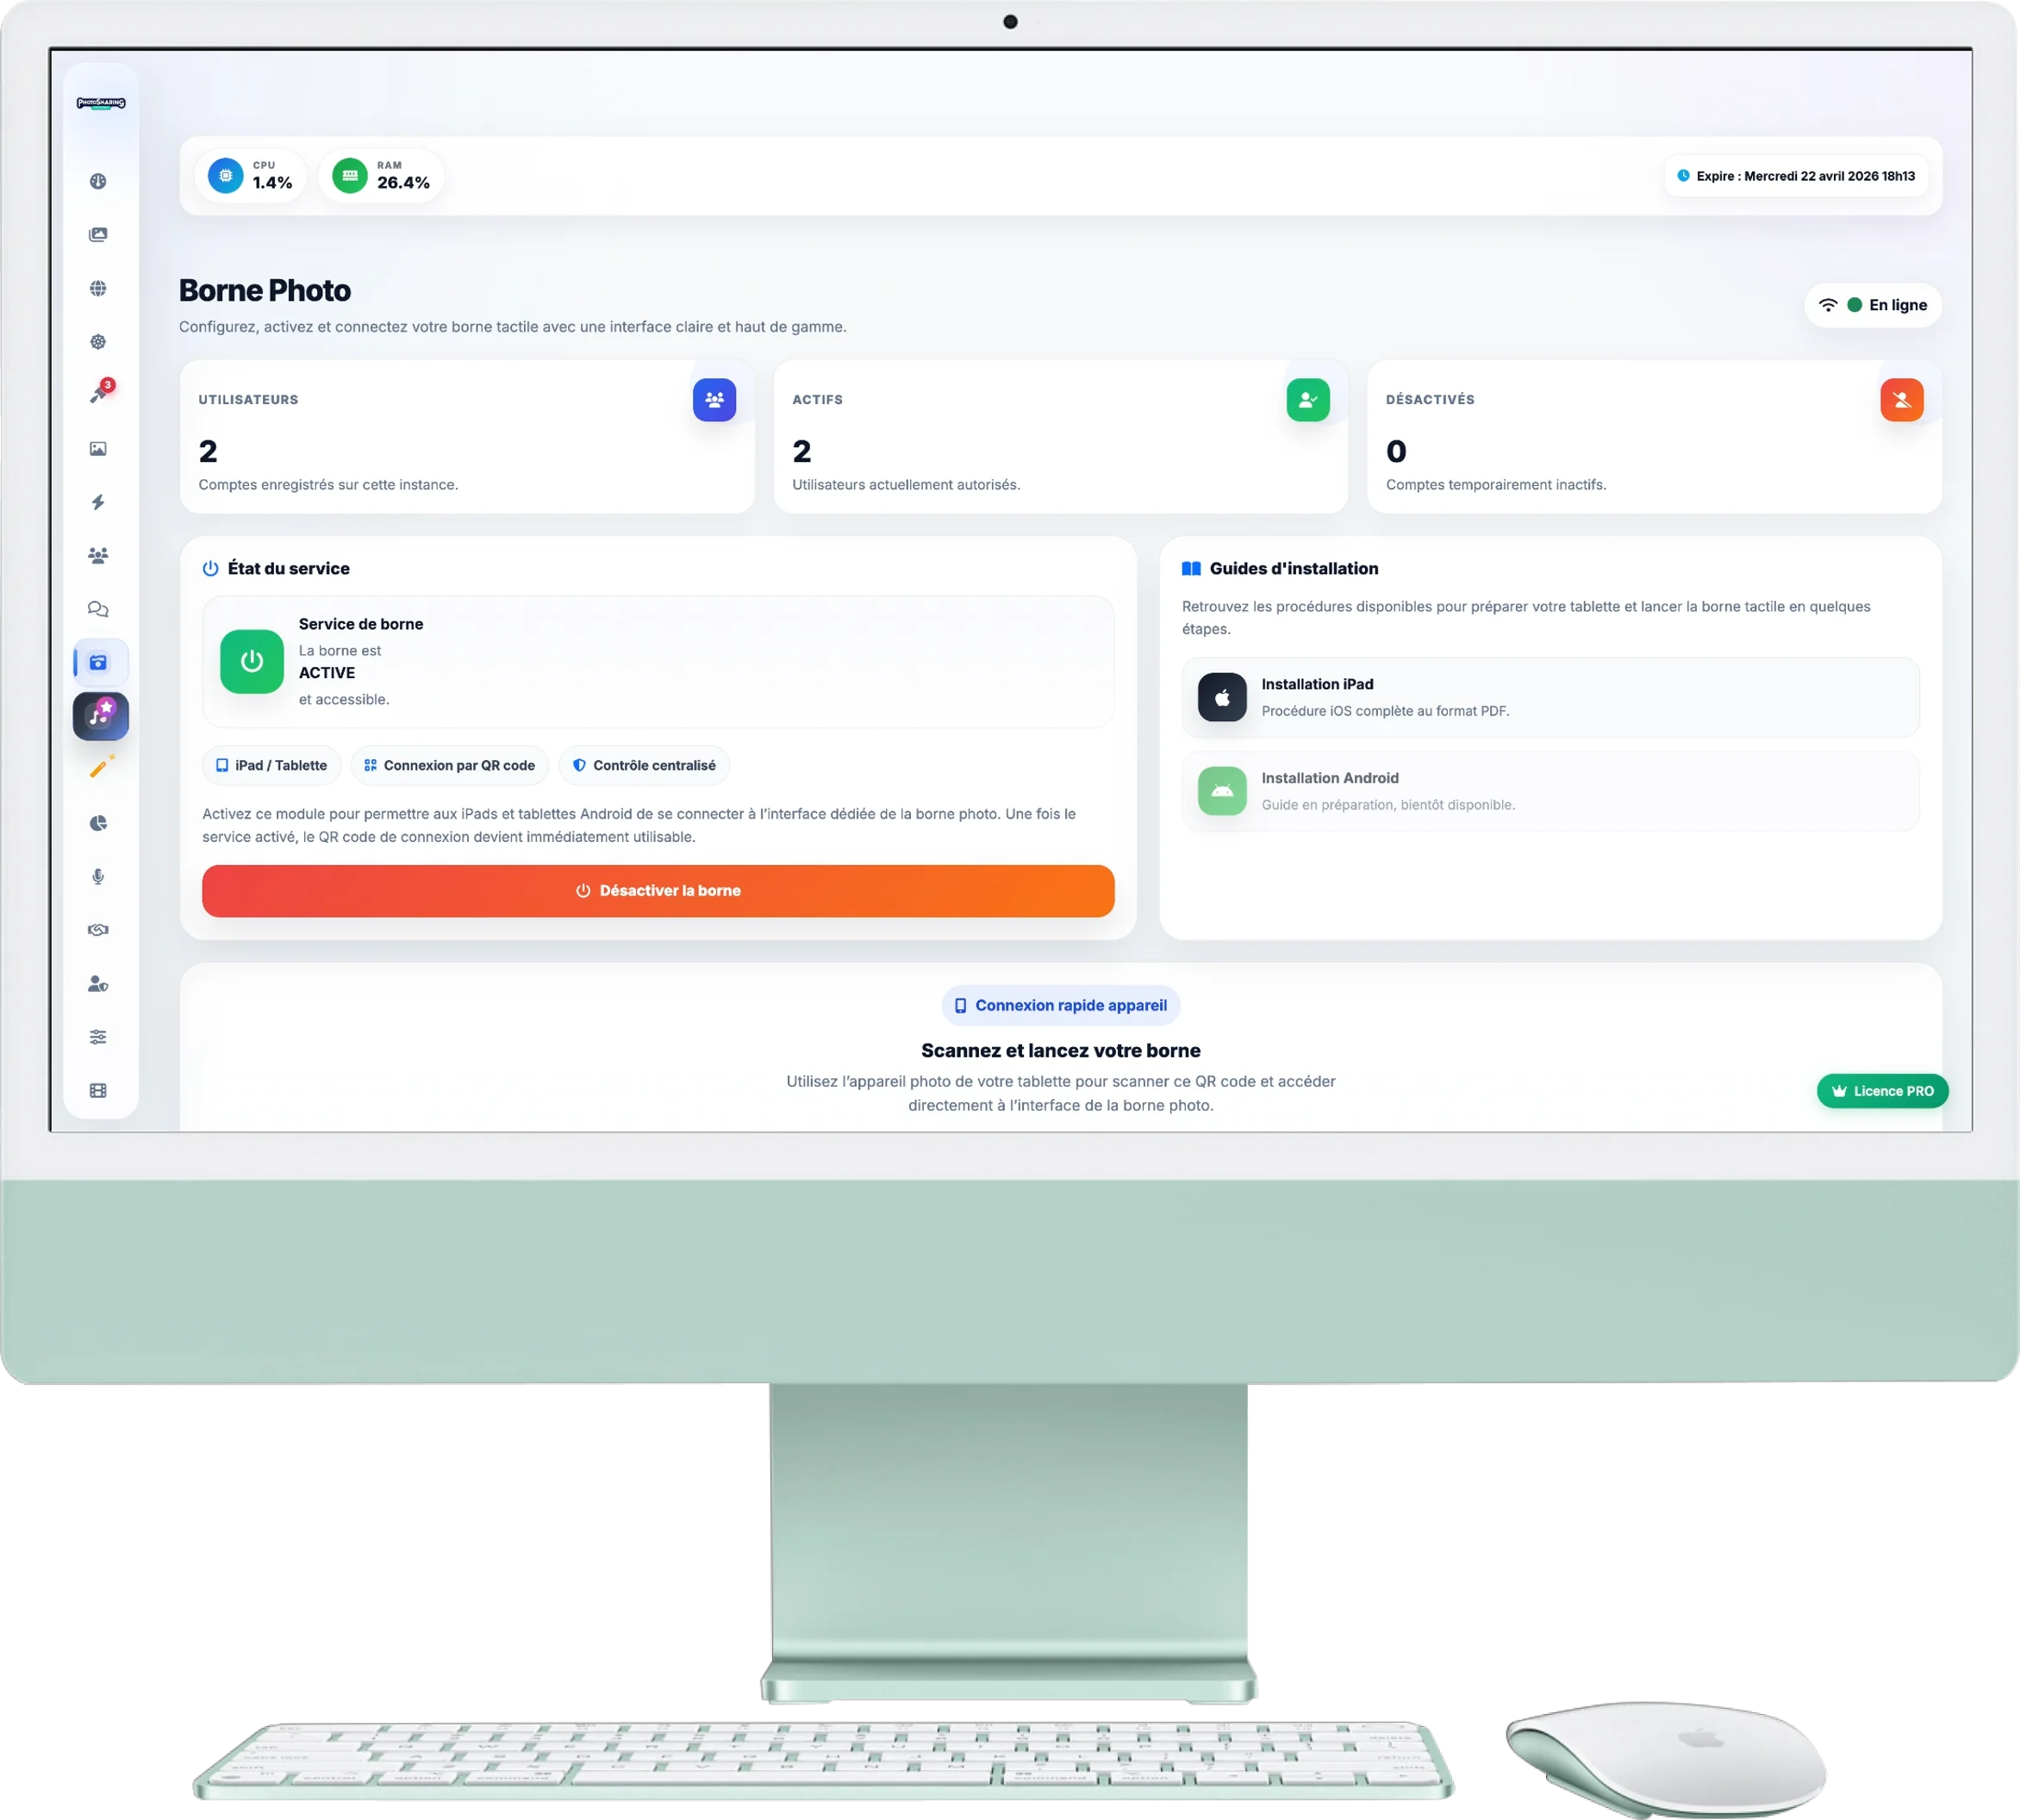
Photo Booth Module (Photobooth)
Easily transform an iPad or Android tablet into a real interactive photo booth for your event. This module allows you to activate the service and connect your device in a few seconds, completely autonomously.
1. Activation of the Service
The “Service Status” panel acts as the general switch for your terminal:
- Enable/Disable: A click on the large control button instantly turns on or off access to the terminal. A visual indicator (Green or Gray) confirms its status.
- Header indicator: At the very top right of the screen, a dynamic badge (Green “Online” or Red “Offline”) reminds you at any time if the service is active.
2. Installation Guides
For trouble-free installation, guides are at your disposal:
- iPad installation: Click on the Apple block to open the PDF procedure. This document is essential to learn how to lock the iPad screen on the kiosk (using iOS 'Guided Access').
- Android installation: (Coming soon) An equivalent guide to lock Android tablets.
3. Quick Tablet Connection
To link your tablet to your event without entering an address manually:
- Take the tablet that will be used as a photobooth.
- Open his camera and scan the large QR Code displayed in the center of this menu.
- The tablet will open directly to the correct interface, ready to photograph your guests.
4. Best Practices
To guarantee a 100% smooth experience for your guests, follow these golden rules:
- Network : Make sure the tablet receives the room's Wi-Fi or has a good 4G/5G connection.
- Full screen mode: On iPad, use Safari's "Add to home screen" function so that the terminal opens like a real application (without the internet address bar).
- Locking: Always remember to activate "Kiosk Mode" (or Guided Access) to prevent smart people from leaving the photo application during the evening.